Saturday, July 23, 2011

A look at pudding bowls, and a pudding

Emily from Kuala Lumpur wants to see details of steamed pudding bowls. I'm not sure, but I suspect that these are unique to New Zealand. Every recipe I see from England (the home of the steamed pudding) just uses a china pudding bowl covered with foil or paper and string.

Anyway, here are my pudding bowls:

This one is "my" one. I've owned it for years, and it's very similar to the one my mother had:


It closes by that long arm on the lid, it pivots around its rivet and hooks under the rim of the bowl, like so:


The short arm doesn't move, it just hooks under the rim on the other side.

My second pudding bowl is "Auntie H's bowl". It belonged to my Aunt Helen and I got it when she moved into a retirement home.


It has a completely different closure, being a nut that unscrews from a bolt that sticks through the lid …


… from the middle of the bowl:


And it makes a ring-shaped pudding. Obviously.

What better pudding to make in Auntie H's bowl than Auntie H's sago fruit pudding. Here's the recipe:


Auntie Helen was a typist and office manager, so her recipes (which I also inherited when she went into the home) are extremely well organised in little folders, and neatly typed.

Two tablespoons of sago …


… with enough milk to cover, and left to soak overnight:


A cup of breadcumbs …


… a cup of sugar …


… and a cup of raisins:


I prefer these "sticky" raisins:


Two tablespoons of melted butter …


… and a teaspoon of baking soda dissolved in boiling water …


… using the same cup I melted the butter in to save dishes …


… all mixed in together …


… put in the buttered pudding bowl  …


… and boiled in a pot of water for two hours:


I think I should have used slightly less milk, as it was a bit gooey:


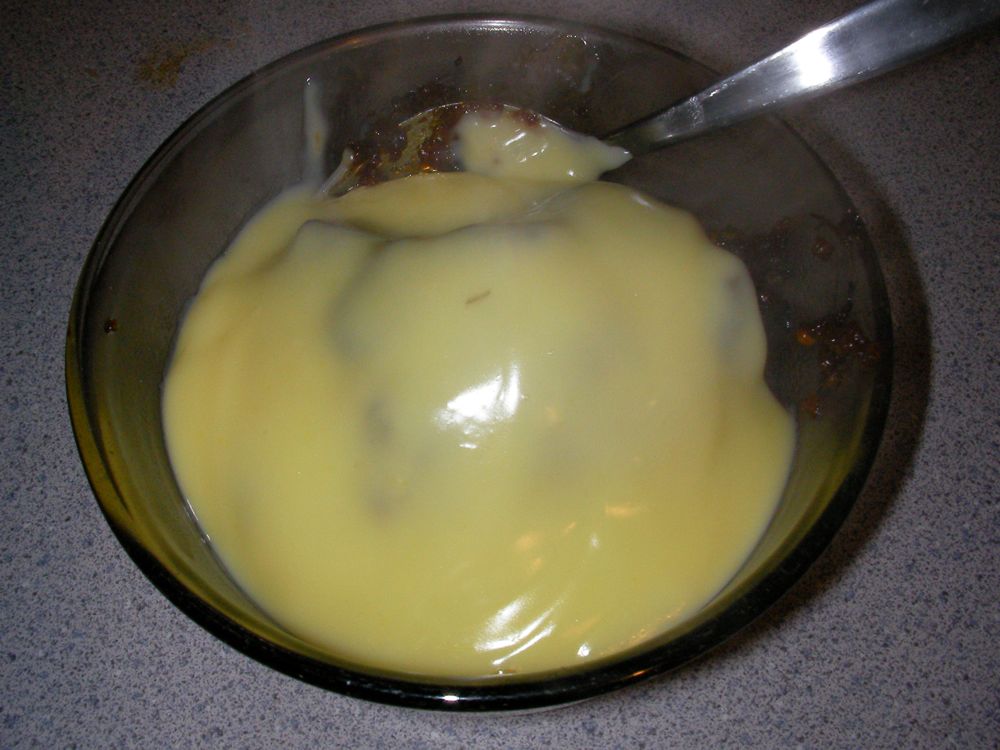
But still delicious with custard on:


Waffles 2

Crispy waffles this time. I had owned the crispy waffle iron for years and never used it. At least, that's not quite true. I used it once, but the results were inedible (mostly melted out all over the stove) so that doesn't count.

I thought it was possible that I could use this waffle iron to make waffle ice cream cones, so I searched the internet for crispy waffle recipes. The most hopeful one was this stroopwafel recipe. I had found proper waffle cone recipes before, but they were the things which melted out all over the stove so I wanted an alternative.

Stroopwafels are easy as pie to make.

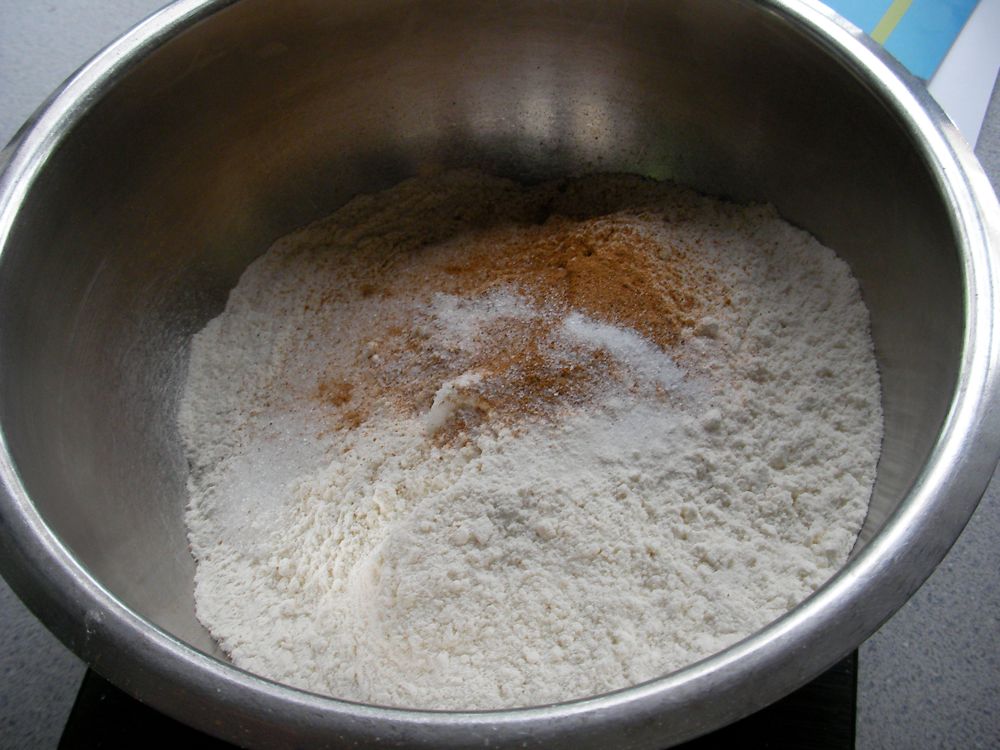
Dry ingredients into a bowl …


… add butter …


… rub in until breadcrumb-like …


… add egg and milk …


… and work to a stiff dough:


Heat waffle iron …


… take smallish ball of dough …


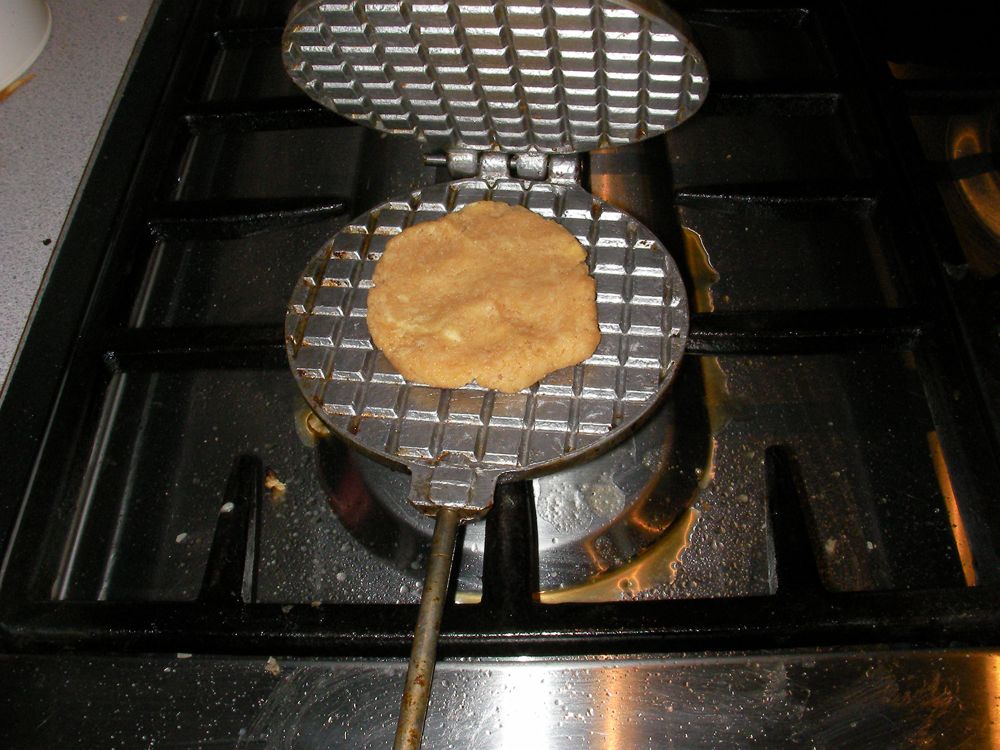
… flatten slightly and put in hot waffle iron …


… squash …


… cook on both sides


… until done:


See all the goo around the gas burner? That's melted butter, it all melted out of the sides of the iron. I suspect you could use quite a bit less than is in the recipe!

The waffles were too thick to roll into cones (they cracked), but were none the less delicious.


I took most of them to work, and Fabienne, who is Belgian, was delighted. She said they really took her back to her Mum's kitchen.


I made 1/3 of the following recipe, and I didn't do the syrup part. That would have been just too sweet for me.

Original recipe from Stroopwafel Shop.

Ingredients: waffles (12 pieces):   
300g caster sugar
450g butter
3 eggs
3 sp milk
600g flour
cinnamon
salt       

syrup:
600g cane-sugar syrup
300g butter
   
Preparation:
Mix the sugar with the eggs, milk, flour, cinnamon, salt and the butter sliced in pieces. Make 12 small balls.
Preheat the waffle iron. Squeeze a paste ball in the iron. Bake the waffle in about 30 seconds.
Cut the waffle in two thin waffles and spread the waffle with the mix of syrup and butter.

Waffles

For some reason or other I had a yen for waffles a couple of weekends ago.

I have a couple of waffle irons, one for thick Belgian ones and one for thin crispy ones. Neither of them is electric, they need an external heat source. When my son was small we used quite often to make thick waffles on the fire in winter, then sit scoffing them with jam and whipped cream. Back then I used to make them with what was basically a thick crêpe mix - flour, egg, salt, milk, and melted butter. Perfectly yummy, but I wanted to see what yeasted ones were like.

I used this recipe, from La cuisine de Rosine. My French is just good enough to cope with recipes, although I sometimes have to look up the odd ingredient.

Here's the yeast (levure) with warm milk (lait tiéde) (I didn't feel like using part beer, but might try it some time in the future).


Here's the flour (farine) in a large bowl (grand saladier)


And here is is with the eggs (oeufs), soup spoon of sugar (cuiller à soupe de sucre), milk, yeast, and pinch of salt (pincée de sel):


Rosine suggests mixing the milk in little by little so as not to get lumps (at least I think that's what "grumeaux" must be), I mixed my milk in all at once, just mixing it well. 


Then the melted butter (beurre fondu)  …


… goes in:


 After it's all mixed up you leave it to rise until it's all bubbly:


Then it's time to heat up the waffle iron …


… turning it over a couple of times on a medium gas flame until it's hot enough that butter will sizzle when you pop a little bit in to grease it.


A ladleful of waffle mix goes in …


… and you shut the iron. After a little while (trial and error will tell you when), you turn over the iron so the other side of the waffle can cook.

This is the second side cooked:


And this is the first side:


It's not easy to get just the right amount of mix in so that it completely fills the iron, so the dimples on the first side are always deeper than those on the second.

Belgian waffles with butter and jam:


Yummy.

Recipe

Belgian Waffles

(Approximate translation from La cuisine de Rosine)

Ingredients:
300 ml milk (or a mix of milk and beer)
250 g flour
2 eggs
a pinch of salt
a soup spoon of sugar
75 g melted butter
15 g yeast

Method:
Warm the milk (in a bowl?), mix the yeast with a little of the warm milk.
In a big (bowl?),  something (put?) the flour, add the yeast, the eggs, the salt and the soup spoon of sugar. Mix and add the warm milk little by little so as not to make lumps(?).

When it's all been added, make sure the batter is smooth(?).

Melt the butter and add it to the mixture. Leave it so rest in a place that's not too cold, so the batter can rise.

Some people recommend beating the egg whites to (snow? Probably means stiff peaks.) and then adding delicately (one assumes this means folding in) to the batter just before cooking.

Heat the waffle iron and cook the waffles. They should be crispy on the outside and soft in the middle. Serve them with some things I can't translate. Jam and butter or jam and whipped cream is good enough for me. It also says something about adding bergamot to them if you want. Somehow or other.

French version: (for people whose French is better than mine)


    30 cl de lait ( ou moitié lait moitié bière )
    250 g de farine
    2 oeufs
    1 pincée de sel
    1 cuillère à soupe de sucre
    75 g de beurre fondu
    15 g de levure de boulanger

Faire tiédir le lait, dans un bol. Diluer la levure avec un peu de lait tiède.

Dans un grand saladier, mettre la farine, ajouter la levure , les oeufs , le sel et la cuillère à soupe de sucre. Mélanger et ajouter le lait tiède petit à petit pour ne pas former de grumeaux.

Une fois tout le lait ajouté, s'assurer que la pâte est lisse.

Faire fondre le beurre et l'ajouter à la préparation. Laisser reposer dans un endroit pas trop frais, la pâte doit monter.

Certaines personnes recommandent de battre les blancs en neige bien ferme et de les ajouter délicatement à la pâte juste avant la cuisson. Bien faire chauffer le gaufrier et faire cuire les gaufres. Elles sont légèrement croquantes à l'extérieur et moelleuses à l'intérieur. Les servir avec de la vergeoise ou du sucre glace comme dans les foires.
Si vous préférez les gaufres fourrées, allez donc voir celles de Bergamote !... à condition bien sûr de posséder le gaufrier adapté, voir ici.

Why I haven't been posting much lately

After years of covering up disintegrating carpet with rugs and mats, I've finally bitten the bullet and decided to recarpet my living room.

The problem has been two-fold - the first was books. I have a lot of books, and they live in bookcases in my living room. Before carpet gets laid, bookcases need to be moved, and before that can happen, books need to be taken off the shelves and stored elsewhere. And the books are ordered in the shelves both by genre and alphabetically, so I can't leave it to the carpet guys to do.

The second problem is the doors. The reason the carpet is disintegrating in the first place is that the sun shines through both the front door and the ranch slider straight onto the carpet, and it is the UV that is killing the carpet. So there was no point in recarpeting until I did something about the doors - UV resistant glass was obviously the solution, but I didn't want to spend money putting it in the ranch slider because I hate it. So before the carpet happens, a whole new door needs to happen too.

I debated with myself for ages over whether to replace all the carpet or just the living room and hall, but decided to go the more economical route. The carpet in the bedrooms is still good as new, and I managed to get replacement carpet for hall and living room that's almost identical to it. Not quite identical, but I'm hoping it won't be too noticeable at the joins.

Carpet in front of ranch slider:


Note the loss of pile and discolouration. Those bits of white fluff are from the flokati rug that usually covers it. Seems little point in vacuuming it up when the whole lot is going to be removed on Wednesday.

Carpet in front of front door:


Carpet in bedroom - in perfectly good nick, just like the carpet in the middle of the living room, and in fact everywhere except in front of the glass doors:


Ranch slider:


The only bit of that ranch slider that opens is the middle panel. It seems a waste to me, and I'm getting it replaced with bifold doors that will open right up, making nearly the whole wall of the living room open to the deck. The new door will be double glazed UV resist glass, and I'm getting the rest of the living room windows and the front door retrofitted with double glazing too.

Anyway, the door is going in on Tuesday, and the carpet is being replaced on Wednesday, so for the last few weeks I've been slowly packing books and china away in boxes and storing them in one of the spare bedrooms.

Boxes stacked all around spare bed:


I was able to get a lot of paper boxes from work …


… fifty or so all together I think, …


… they're just the right size for books, and not too heavy when full.

I took the opportunity to do some pruning as well, putting aside books I'm never ever going to read again, and also out-of-copyright paperbacks I can download from Project Gutenburg. So I was taking books of shelves, checking availability on my iPad, downloading, then sorting into "keep" and "discard" boxes.

This is the "discard" pile. It also includes vinyl records, as I no longer have anything on which to play them and have long since digitised the contents:


They will not go to waste. Dunedin's main (old and very ornate) theatre has an annual 24 hour book sale, and my old books will be going there. A bit of a change, usually the traffic is in the other direction.

This is what my living room looks like now:


Book cases and vitrine are completely empty. When they go back in after the carpet install I'll be earthquake-proofing them. The three bookcases that sit against the wall just need hefty screws through the backs into studs in the walls, but the two cases that project into the room back-to back (but with about a foot gap between them) and have the vitrine arranged with its back to their ends are not so easy. I'm constructing a wooden thing that will screw across the tops of the bookcases and continue down one end. The vitrine can then be screwed to the vertical bit and hopefully the whole arrangement will be rigid enough not to fall over in anything but a really big shake.