Saturday, July 23, 2011

Efficient use of the whole chook

Whole chickens were on special.

I removed the ribcage …


… by cutting the skin down the spine …


… and gently cutting flesh away from ribs, and severing hip and shoulder joints …


 … leaving ribcage …


… and the rest of the chook:


I cut off the legs (and wings) …


… leaving the breast and most of the skin:


I peeled the skin away, …


… then rearranged the breasts on the skin in a less biologically accurate, but more even, fashion:


I made stuffing by sweating chopped onion in lots of butter …


… until it was beginning to brown …


… picked some parsley and sage from the garden …


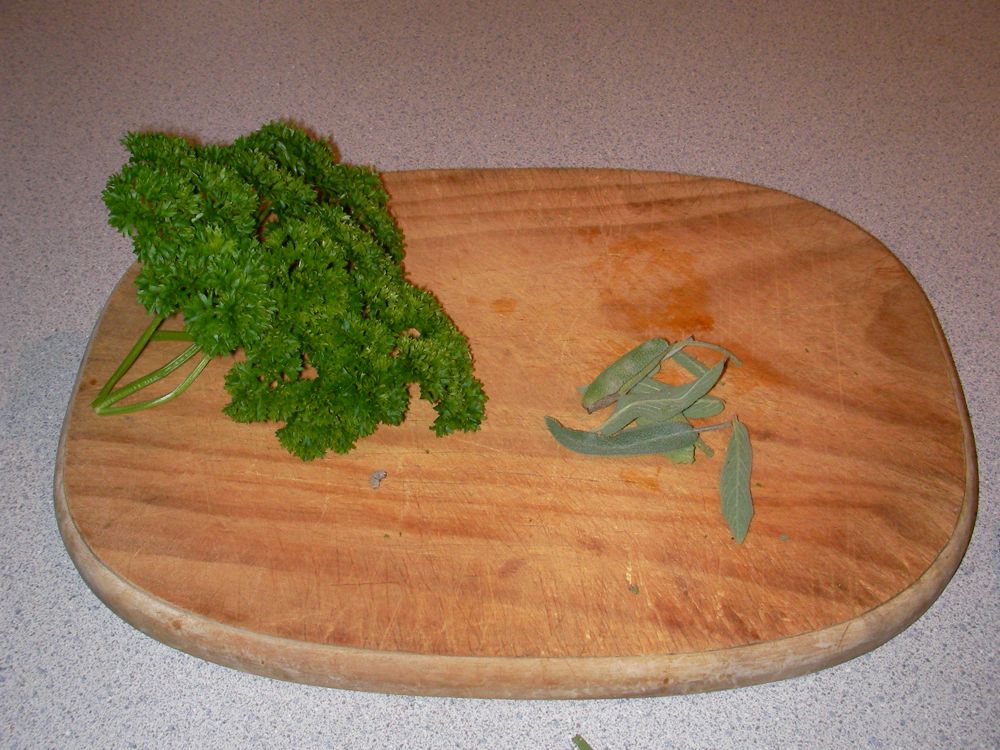
… and chopped it up finely …


… then added the onions, butter, chopped herbs, and salt, to a cup or so of white breadcrumbs from the freezer:


The stuffing went on top of the chicken breasts …


… and I got out Uncle Ted's old upholstery needle (Uncle Ted was the husband of Auntie Helen of the steamed pudding bowl) and threaded it with string:


Bit by bit I sewed up the chicken's skin around its breast and the stuffing …


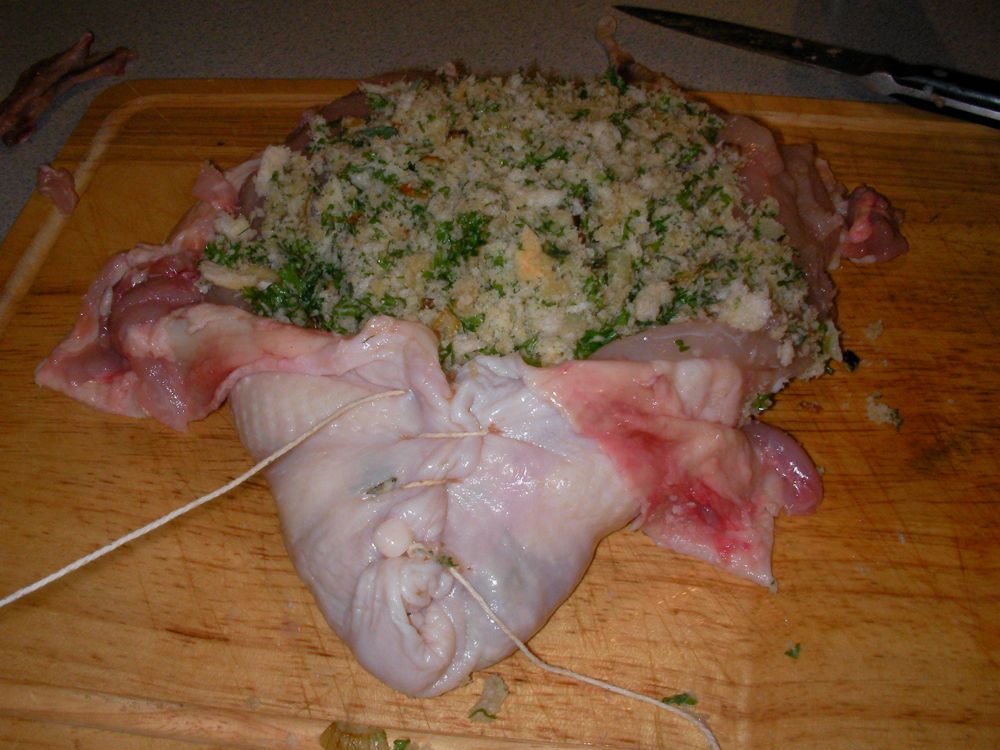
 … until it was a nice neat parcel …


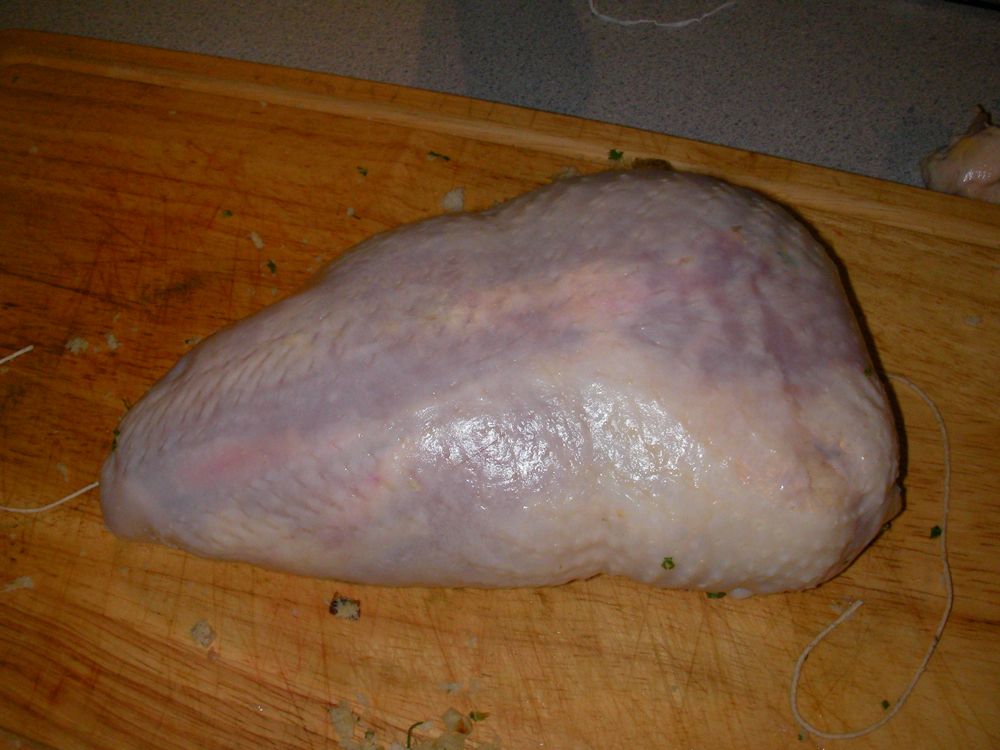
… which I put in an oven dish, sitting on the ribcage and wings, with the legs to the sides:


I cooked them for about 45 minutes …


… one leg was dinner, and the stuffed breast and other leg went into the fridge to be eaten cold.

The carcase and wings …


 … went into a pot of water with onion and some sliced shiitake mushrooms and were boiled for a couple of hours, making a delicious stock …


…  from which I removed the bones and strained the meat and mushrooms. I added the meat and mushrooms to cooked soba noodles and put stock and noodles in the fridge, ready to be reheated in portions and eaten together: 


The soup and noodles were three lunches worth.

Red sky

I took this a couple of weeks ago at sunrise when we were due some bad weather:


We've had the most amazingly good winter so far, with bright sunny days and blue skies. The above mentioned bad weather lasted about three days, then we returned to bright sun and blue skies again.

Another southerly blast is supposed to be due any time, with snow in the hill suburbs of Dunedin.

A look at pudding bowls, and a pudding

Emily from Kuala Lumpur wants to see details of steamed pudding bowls. I'm not sure, but I suspect that these are unique to New Zealand. Every recipe I see from England (the home of the steamed pudding) just uses a china pudding bowl covered with foil or paper and string.

Anyway, here are my pudding bowls:

This one is "my" one. I've owned it for years, and it's very similar to the one my mother had:


It closes by that long arm on the lid, it pivots around its rivet and hooks under the rim of the bowl, like so:


The short arm doesn't move, it just hooks under the rim on the other side.

My second pudding bowl is "Auntie H's bowl". It belonged to my Aunt Helen and I got it when she moved into a retirement home.


It has a completely different closure, being a nut that unscrews from a bolt that sticks through the lid …


… from the middle of the bowl:


And it makes a ring-shaped pudding. Obviously.

What better pudding to make in Auntie H's bowl than Auntie H's sago fruit pudding. Here's the recipe:


Auntie Helen was a typist and office manager, so her recipes (which I also inherited when she went into the home) are extremely well organised in little folders, and neatly typed.

Two tablespoons of sago …


… with enough milk to cover, and left to soak overnight:


A cup of breadcumbs …


… a cup of sugar …


… and a cup of raisins:


I prefer these "sticky" raisins:


Two tablespoons of melted butter …


… and a teaspoon of baking soda dissolved in boiling water …


… using the same cup I melted the butter in to save dishes …


… all mixed in together …


… put in the buttered pudding bowl  …


… and boiled in a pot of water for two hours:


I think I should have used slightly less milk, as it was a bit gooey:


But still delicious with custard on:


Waffles 2

Crispy waffles this time. I had owned the crispy waffle iron for years and never used it. At least, that's not quite true. I used it once, but the results were inedible (mostly melted out all over the stove) so that doesn't count.

I thought it was possible that I could use this waffle iron to make waffle ice cream cones, so I searched the internet for crispy waffle recipes. The most hopeful one was this stroopwafel recipe. I had found proper waffle cone recipes before, but they were the things which melted out all over the stove so I wanted an alternative.

Stroopwafels are easy as pie to make.

Dry ingredients into a bowl …


… add butter …


… rub in until breadcrumb-like …


… add egg and milk …


… and work to a stiff dough:


Heat waffle iron …


… take smallish ball of dough …


… flatten slightly and put in hot waffle iron …


… squash …


… cook on both sides


… until done:


See all the goo around the gas burner? That's melted butter, it all melted out of the sides of the iron. I suspect you could use quite a bit less than is in the recipe!

The waffles were too thick to roll into cones (they cracked), but were none the less delicious.


I took most of them to work, and Fabienne, who is Belgian, was delighted. She said they really took her back to her Mum's kitchen.


I made 1/3 of the following recipe, and I didn't do the syrup part. That would have been just too sweet for me.

Original recipe from Stroopwafel Shop.

Ingredients: waffles (12 pieces):   
300g caster sugar
450g butter
3 eggs
3 sp milk
600g flour
cinnamon
salt       

syrup:
600g cane-sugar syrup
300g butter
   
Preparation:
Mix the sugar with the eggs, milk, flour, cinnamon, salt and the butter sliced in pieces. Make 12 small balls.
Preheat the waffle iron. Squeeze a paste ball in the iron. Bake the waffle in about 30 seconds.
Cut the waffle in two thin waffles and spread the waffle with the mix of syrup and butter.